
교체 준비를 위해, 교체용 망치 세트를 위해 연락. 각 행의 망치는 특정 순서로 배선되어 공장에서 세트로 균형을 맞춰 조정됩니다. 변경할 때 망치의 순서와 이 균형을 유지해야 합니다. 그렇지 않으면, 균형이 맞지 않은 망치가 과도한 진동을 일으킬 수 있습니다.
회전 시: 단계를 따르기 1 – 11 아래, 그리고 해머 더미를 회전시켜 새 타격 가장자리를 사용해 단계를 완료한다 12-15.
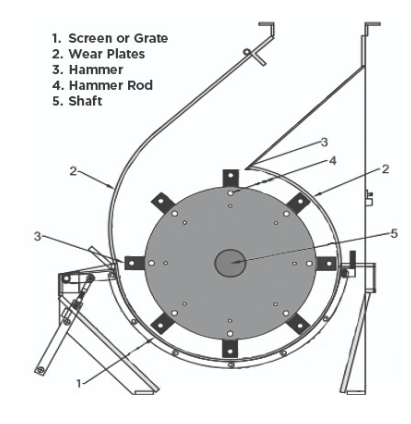
교체용: 새 해머는 표시된 그룹으로 배송 1 받는 사람 8. 새 해머를 그룹에 배치하기 1 행에 배치 1, 단계에 설명된 대로 12-15.
단계:
- 주 전원 차단기를 끄기.
- 현장의 OSHA 승인 잠금 해제/태그아웃 절차로 주 스위치를 안전하게 확보하기.
- 밀 후드를 열고.
- 첫 번째 줄부터 시작해
- 줄의 한쪽 끝에서 칼라를 제거해라.
- 막대를 빼내고, as each hammer is released, remove the hammer.
- Stack each hammer in the same order as on the rod.
- Inspect the rod.
- If you see excessive grooving on the rod, replace the hammer rod.
- If you are replacing the hammers, you should also replace the hammer rod.
- Start with Row 1. Insert one hammer between every other disc . (Some rotors use 2 hammers between each disc.)
- Insert the hammer rod to hold the hammer in position.
- Insert the next hammer and continue until all hammers for Row 1 are in place.
- Lock the rod, using the collar or cotter pin in the end of the rod.
- On Row 2, stagger the hammers between the discs opposite Row 1.
- Continue installing the hammers on the rods, working around the rotor in numerical order from Rows 3 through 8.
- After all the hammers have been re-installed, rotate the rotor by hand to ensure there are no catches.
- 밀 보닛을 닫아라.